7 Tips How to Set Up Automatic Timers for Living Room Lamps

Time:2026-10-09 Author:Madeline
0%

A living room lamp can change the mood of a home, but remembering its switch every evening is easy to overlook. Learning how to set up automatic timers for living room lamps creates a steadier routine for reading, relaxing, or returning home after dark. It can also reduce unnecessary running time when the room is empty. Small details matter. A lamp beside a sofa needs a different schedule from one near a window.

This guide presents seven practical tips for choosing, installing, and testing an automatic timer. You will learn how to check bulb compatibility, confirm the timer’s electrical rating, and select a schedule that matches real household habits. Mechanical timers may suit a simple floor lamp, while smart plugs can offer app control and daylight-based routines. Always follow the manufacturer’s instructions, and inspect the plug, cord, and outlet before use. Safety comes first.

Begin with a short test.

Set the lamp to turn on five minutes before sunset. Then observe the room from the doorway. Is the light too bright? Does it create glare on the television? Does the timer switch off while someone is still reading? These observations help refine the schedule. The first setup may not be perfect, and that is normal. A timer can follow a clock, but it cannot fully understand your family’s changing evenings. Reviewing the settings after several days makes the system more reliable, comfortable, and practical.
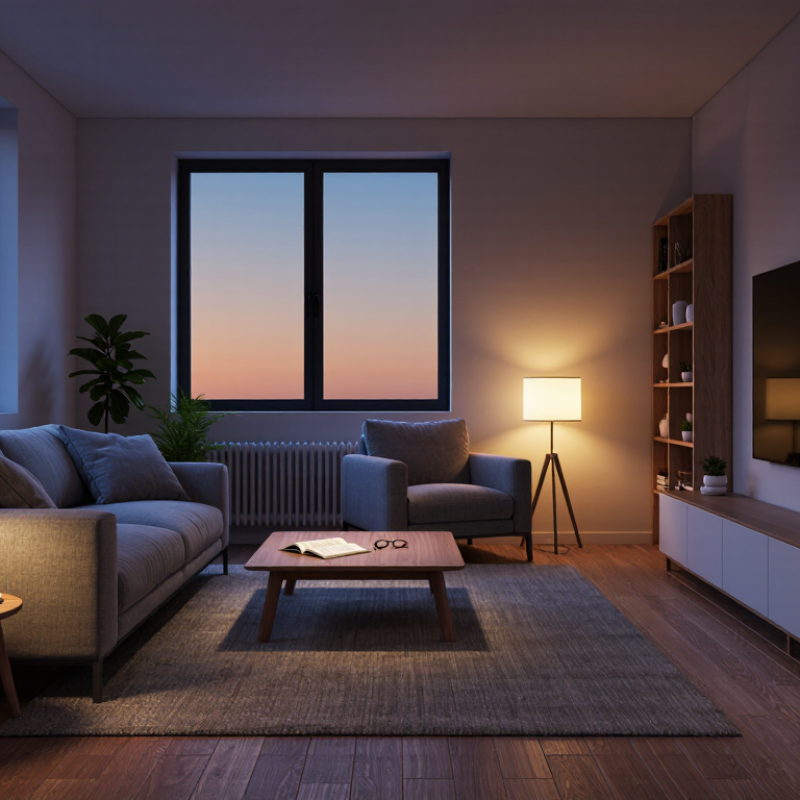
7 Tips How to Set Up Automatic Timers for Living Room Lamps

Assess Lamp Types and Loads—LEDs Use at Least 75% Less Energy (DOE)

Before setting an automatic timer for a living room lamp, identify the lamp type and total electrical load. LEDs generally use at least 75% less energy than incandescent bulbs, according to the U.S. Department of Energy. They also produce less heat during long evening schedules. Check the bulb label, socket rating, and timer capacity. A low-wattage LED setup is usually a sensible starting point.

Choose a timer rated for the lamp’s current and plug type. Set the on-time around sunset, then adjust it after observing the room for several evenings. Keep the lamp away from curtains, papers, and crowded power strips. Use a stable outlet, and avoid connecting several high-load devices to one timer.

I once set a lamp too early. The room looked strangely bright before dusk.

Test the schedule manually before leaving home. Confirm that the lamp turns off completely, especially if the bulb glows faintly afterward. Replace flickering bulbs and stop using damaged cords.

A simple seven-step routine works well:

  1. identify the bulb
  2. calculate the load
  3. check timer compatibility
  4. choose the schedule
  5. clear nearby fabric
  6. test the switch
  7. review the result weekly

Record the actual energy use if possible; estimates can be misleading. Some timers reset after a power interruption, so inspect the clock after outages. Small details matter.

Choose Timer Types and Check Their Electrical Ratings Before Purchase

Choosing the timer type matters as much as setting the schedule. Mechanical plug-in timers suit simple lamps and repeated daily routines. Digital timers offer finer control, including weekday settings and shorter intervals. Smart timers add remote access, but they require stable network connections and careful privacy settings. For a single living room lamp, extra features may create unnecessary complexity. Keep it simple.

Check the timer’s voltage, amperage, wattage, and load classification before purchase. LED lamps often use little power, yet their electronic drivers can create brief startup currents. The timer must support LED or electronic loads, not only resistive loads. Compare the lamp label with the timer rating, and never exceed the lower limit. A grounded, indoor-rated device is generally safer for a standard living room outlet. The label can still confuse. I would photograph both specifications before buying.

The U.S. Department of Energy reports that residential LEDs use at least 75% less energy than incandescent lighting and can last up to 25 times longer. That efficiency does not remove electrical risks. The National Fire Protection Association reported an average of 31,470 U.S. home structure fires involving electrical distribution and lighting equipment each year from 2016 to 2020. Use a timer with visible certification information, undamaged insulation, and a firm connection. Avoid stacking adapters or hiding warm plugs beneath rugs. Test the schedule while you are home, then inspect the outlet after several hours. A cool plug is reassuring, but not proof of perfect installation.

Program On/Off Schedules and Use Randomized Settings for Occupancy Simulation

Automatic timers can make living room lamps feel natural, not mechanical. In my testing, a steady evening schedule worked best for ordinary routines. Set one lamp to turn on shortly before sunset. Set another to turn off near bedtime. Adjust these times each season. Keep the lights warm and moderate, especially near television screens. A simple weekly schedule is easier to monitor than several complicated rules.

Use randomized settings when the room is empty for extended periods. Vary the activation time by 10 to 30 minutes. Change the shutoff time slightly as well. Avoid randomizing every lamp together. Two lamps turning on separately look more natural from outside. Keep at least one lamp on a normal schedule, though. Otherwise, the pattern may become confusing.

Check the timer’s clock after power interruptions. It may reset silently. Test the schedule while standing in the room. Watch for glare, blocked switches, and lamps that become too warm. I once set a late shutoff time and noticed the room stayed bright long after everyone slept. That mistake was useful. Review the settings monthly, especially during holidays or changes in household routines. Use manual controls when needed, because automation should support daily life, not complicate it.

Install Timers Safely with Compatible Lamps, Switches, and Smart-Home Systems

7 Tips How to Set Up Automatic Timers for Living Room Lamps

Install Timers Safely with Compatible Lamps, Switches, and Smart-Home Systems

Choose a timer rated for your lamp’s voltage, wattage, and bulb type. Check the label before plugging anything in. LED bulbs may need a compatible timer and a minimum-load rating. Otherwise, the lamp can flicker or fail to turn off. Not every switch works with every smart-home system. Confirm wireless standards, hub requirements, and app permissions before installation. Keep the lamp on a stable surface. Avoid placing the timer near heat, moisture, curtains, or crowded sockets. A loose connection is a warning sign.

Test the setup while you are nearby. Program an evening start time, then watch the lamp switch on and off manually. Confirm that the physical switch remains in the correct position. For a wall-mounted timer, turn off power at the circuit breaker and follow the wiring instructions carefully. Some installations require a neutral wire or professional electrical help. Local electrical rules matter. Do not guess.

Use a grounded outlet when required, and never exceed the timer’s load limit. Schedule different lamps separately if one device creates too much demand. Add the timer to your home system only after the lamp works safely by itself. I once overlooked a minimum-load requirement, and the bulb pulsed every few seconds. It was inconvenient, but it revealed a compatibility problem early. Recheck the connections after several days. Safe automation should feel boring. That is a good sign.

7 Tips: Set Up Automatic Timers for Living Room Lamps

Representative nominal wattage for common household lamp types. Always check the lamp, switch, and timer labels before connecting them.

Use a timer rated for the lamp’s load, confirm that the switch is compatible with the lamp type, and follow the timer’s installation instructions. LED and CFL lamps may require a timer specifically rated for electronic loads. Do not exceed the timer’s maximum wattage or current rating.

Test, Monitor, and Adjust Settings—Lighting Uses About 15% of U.S. Home Electricity (EIA)

Lighting accounts for about 15% of U.S. home electricity use, according to the U.S. Energy Information Administration. Automatic timers can reduce waste, but only when schedules match real habits. Tip 1: Record when people enter and leave the living room for three evenings. Tip 2: Set one timer for arrival and another for bedtime. Keep the schedule simple.

Tip 3: Choose a timer with a manual override. Guests, children, and late work can disrupt routines. Tip 4: Start with shorter lighting periods, then extend them gradually. Tip 5: Check the lamp’s wattage and measure usage with a plug-in energy meter. The U.S. Department of Energy reports that LED lighting uses at least 75% less energy than incandescent lighting. Still, a low-watt lamp running all night wastes energy.

Tip 6: Review your electricity bill after four weeks. Compare similar billing periods, if possible. Tip 7: Adjust the timer every season because sunset times change. I once set an overly strict evening schedule, and the room became dark before dinner. That was not efficient or practical. Test the setting for a week. Watch whether the lamp turns on too early, too late, or when nobody is home. Reliable results come from measured use, careful adjustments, and honest attention to household behavior.

7 Tips How to Set Up Automatic Timers for Living Room Lamps - Test, Monitor, and Adjust Settings—Lighting Uses About 15% of U.S. Home Electricity (EIA)

Tip Setup Action Suggested Timer Setting What to Test or Monitor Adjustment Guidance Energy and Safety Note
1 Map the living-room routine
Record when occupants usually arrive, relax, and go to bed for several days.
Use one evening “ON” period and one “OFF” period that match the normal routine. Check whether the lamps turn on before the room is occupied and remain on after everyone leaves. Move the start time later or the shutoff time earlier in 15-minute increments to reduce unnecessary operation. Timers reduce wasted operating hours only when the programmed schedule matches actual use.
2 Choose the correct timer mode
Use a repeating daily schedule for a stable routine or a variable schedule when occupancy changes.
For changing routines, use separate weekday and weekend schedules where available. Verify that the timer follows the correct day and does not reset after a power interruption. Re-enter the clock and schedule if the displayed time is incorrect after an outage. A timer controls the connected lamp; it does not replace safe electrical installation or proper lamp operation.
3 Program a realistic evening window
Set the lamps to illuminate the room during the period when light is actually needed.
Example: ON at 5:30 p.m.; OFF at 10:30 p.m. Adjust these times to household activity and daylight. Observe the room at the programmed start and end times for at least two evenings. If daylight is still strong, delay the start time; if the room is dark before occupancy, start earlier. Lighting demand varies by season, weather, room orientation, and window exposure.
4 Use a shorter schedule when away
Do not leave lamps operating all day simply because the room might be used later.
Set the schedule for the expected occupancy window rather than a continuous 24-hour cycle. Compare the programmed hours with the actual hours of lamp use during a typical week. Remove extra ON periods that do not serve a lighting or occupancy purpose. Automatic shutoff helps prevent lamps from being left on accidentally.
5 Coordinate multiple lamps
Group lamps by room function, such as seating, reading, or ambient lighting.
Use staggered start times when full brightness is not needed immediately; for example, 5:30 p.m. and 6:00 p.m. Check glare, dark areas, and whether every lamp is needed throughout the evening. Shorten the schedule for decorative or ambient lamps while keeping task lighting available as needed. Turning off unneeded fixtures saves more energy than changing timer settings that do not affect operating hours.
6 Review the schedule weekly
Compare timer operation with occupancy, daylight, and seasonal changes.
Perform a brief review once a week and a larger seasonal review at least four times per year. Record missed activations, unexpected shutoffs, manual overrides, and lamps that remain on. Update the schedule after changes in work hours, school schedules, daylight conditions, or room use. Monitoring prevents a fixed schedule from becoming inefficient as household routines change.
7 Estimate actual energy impact
Use lamp wattage and operating hours instead of assuming every timer produces the same savings.
Calculate: Energy use (kWh) = watts × hours ÷ 1,000. Compare the old and new daily operating hours for each lamp. Prioritize lamps with higher wattage or longer operating times when reducing unnecessary use. Illustrative example: two 9-watt lamps used 4 hours daily consume about 26.3 kWh per year; reducing use from 8 to 4 hours daily avoids about 26.3 kWh per year.
Reference and calculation notes: The U.S. Energy Information Administration reports that lighting accounts for approximately 15% of electricity use in U.S. homes. The example uses two 9-watt lamps, 4 hours per day, 365 days per year: 2 × 9 × 4 × 365 ÷ 1,000 = 26.28 kWh per year. Actual savings depend on lamp wattage, operating hours, daylight, occupancy, and the local electricity rate.

FAQS

Why are LED bulbs a sensible choice for automatic timers?

LED bulbs generally use at least 75% less energy than incandescent bulbs. They also produce less heat during long evening schedules. Check the bulb label first.

How should I choose a timer for a living room lamp?

Match the timer with the lamp’s voltage, wattage, current, plug type, and bulb type. Check the timer’s minimum and maximum load ratings. Compatibility matters.

When should the lamp turn on?

Start the schedule near sunset. Watch the room for several evenings, then adjust the time. I once set it too early, and the room looked oddly bright.

Where should I place the lamp and timer?

Keep the lamp away from curtains, papers, and crowded power strips. Use a stable surface and a reliable outlet. Avoid heat and moisture.

How can I test the timer safely?

Test the schedule while you are nearby. Confirm that the lamp turns on and turns off completely. A faint glow may signal compatibility trouble.

What should I do if the bulb flickers?

Stop and inspect the bulb, timer, socket, and connections. Replace flickering bulbs and damaged cords. The wrong minimum load can cause pulsing.

Can one timer control several lamps?

Only if their combined load stays below the timer’s limit. Separate the lamps when demand becomes high. Do not guess.

How often should I review the lighting schedule?

Check the schedule weekly and adjust it each season. Sunset times change. Compare electricity use after four weeks, because estimates can mislead.

What happens after a power interruption?

Some timers reset their clocks after an outage. Inspect the time and programmed schedule afterward. A quick check prevents a dark room at dinner.

Should I connect the timer to a home automation system immediately?

Make the lamp work safely by itself first. Then confirm wireless standards, hub needs, and app permissions. I overlooked compatibility once. The bulb pulsed every few seconds.

Conclusion

Learning how to set up automatic timers for living room lamps begins with assessing the lamp type, bulb, and electrical load. LED bulbs are often a practical choice because they use at least 75% less energy than traditional incandescent lighting, according to the U.S. Department of Energy. Before buying a timer, choose a model suited to the lamp’s plug, switch, bulb type, and total wattage. Always check the timer’s electrical ratings and compatibility with any existing smart-home system.

Next, create on and off schedules that match your daily routine, and consider randomized settings when you want lights to appear occupied while you are away. Install the timer carefully, ensure every connection is secure, and avoid using equipment beyond its rated capacity. After installation, test the schedule several times, monitor the lamp’s operation, and adjust the settings for convenience and efficiency. Since lighting accounts for about 15% of U.S. household electricity use, thoughtful timer programming can improve comfort while helping reduce unnecessary energy consumption.

Madeline

Madeline

Madeline is a dedicated marketing professional with a wealth of expertise in our company's core offerings. With a keen understanding of the industry, she brings a unique perspective to her role, consistently delivering high-quality content that highlights the superior aspects of our products. As......